Chapter 12 · Section III — Screening & Early Detection
Self-Exam & Body Literacy
The most important hands on your breasts each month are your own. This is the practice of becoming fluent in your own body.
Body literacy is the simple, radical idea that you are the foremost expert on your own body. No screening tool — however sophisticated — replaces the information your own hands gather, month after month, year after year. Self-exam is not a diagnostic test. It is a relationship.
Done with curiosity instead of dread, the monthly check-in becomes a small ritual of attention: a few minutes to thank these tissues for their work and to learn their evolving language.
Four Quiet Principles
Familiarity, not fear
The point of self-exam is not to find cancer. It is to know your own normal so well that any change becomes immediately noticeable.
Once a month, on the same week
The week after your period ends — when tissue is least tender and lumpy — is ideal. After menopause, choose the same date each month.
Look, then feel, then breathe
Visual inspection comes first, then touch, then a quiet moment of gratitude. Your breasts are not a problem to be solved.
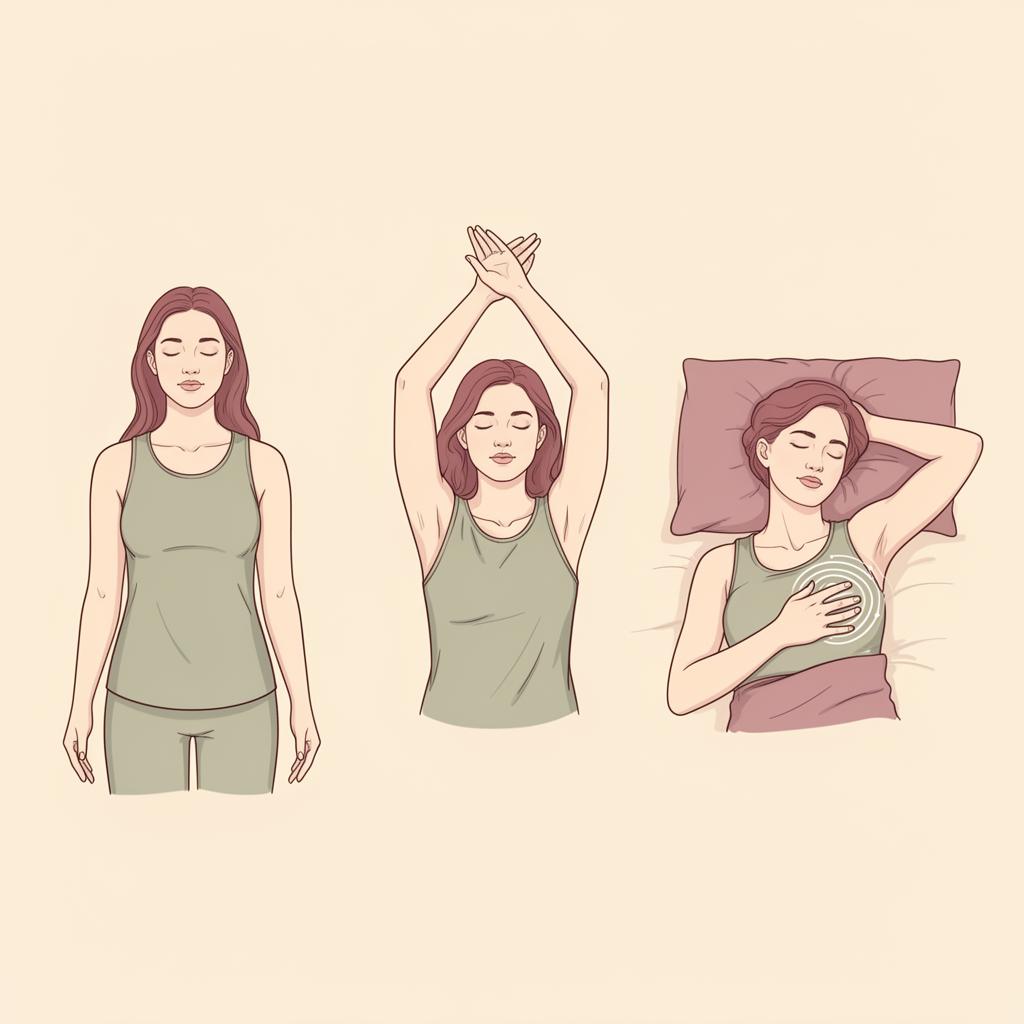
Three positions, one map
Standing, arms raised, and lying down each reveal different aspects of the tissue. Together they form a complete picture.
The five-step monthly practice
Set aside ten unhurried minutes. Light a candle if it helps. The sequence below blends three positions of looking with two positions of feeling — together, they cover the full architecture of your breast tissue.
- 01
Look — arms relaxed
Stand in front of a mirror, shoulders back, arms at your sides. Notice the natural shape, size, and contour of each breast. Breasts are rarely perfectly symmetrical — you're learning your normal.
- 02
Look — arms raised
Raise both arms overhead. Look for any dimpling, puckering, or skin changes that appear when the underlying tissue moves. Check the nipples for any change in position or direction.
- 03
Look — hands on hips
Press your hands firmly on your hips and tighten your chest muscles. Turn slowly side to side. This contraction reveals subtle skin changes that may not appear in other positions.
- 04
Feel — lying down
Lie on your back with a small pillow under your right shoulder and your right arm behind your head. Use the flat pads of your three middle fingers on your left hand to feel the entire right breast. Repeat on the other side.
- 05
Feel — in the shower
Warm, soapy skin makes it easier for fingers to glide. Use the same circular technique. Many women find lumps for the first time in the shower simply because the tissue is more accessible.
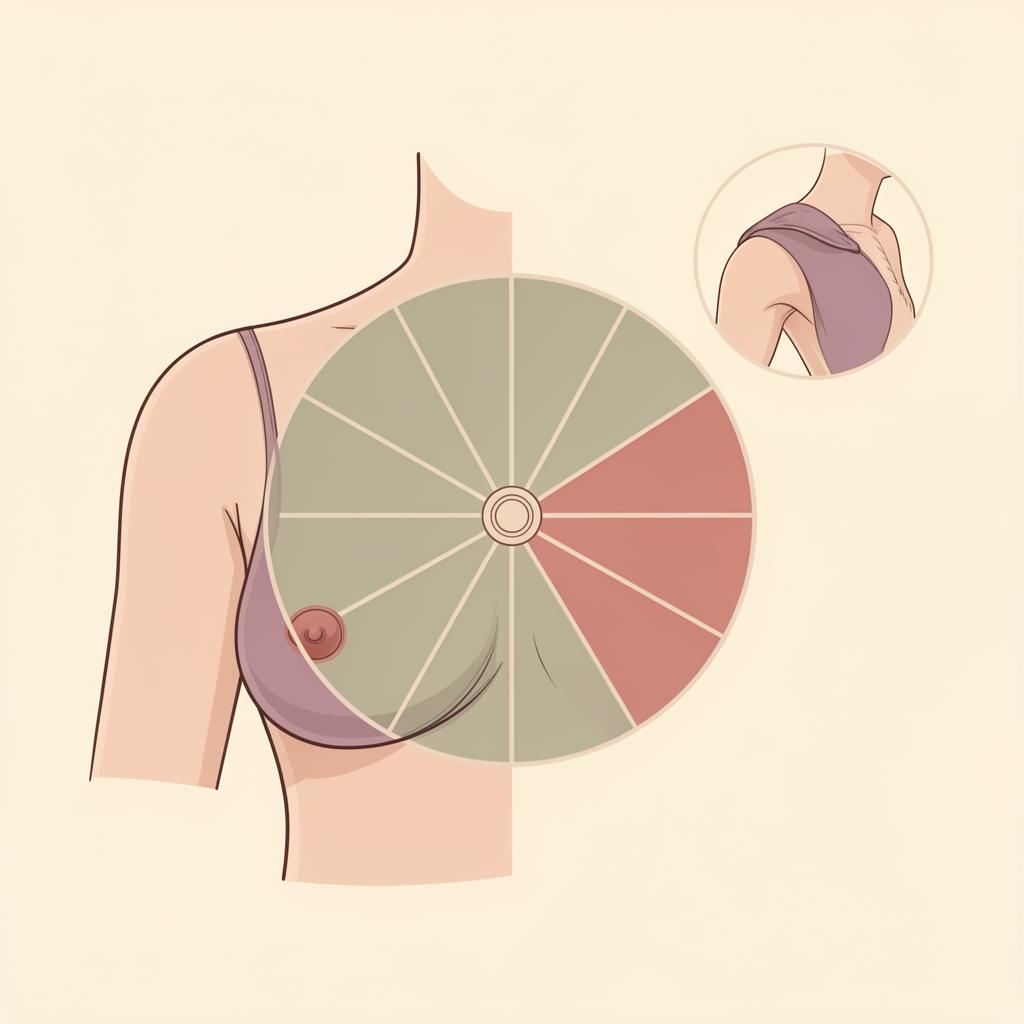
Mapping the tissue
Whichever technique you choose, the goal is full coverage — from the collarbone above to the bra line below, from the breastbone in the center out to the armpit, including the axillary tail of tissue that extends toward the underarm.
Circular
Move in small, dime-sized circles, spiraling outward from the nipple to the outer edge of the breast.
Vertical strip
Move up and down in vertical lines, like mowing a lawn, covering the entire breast from collarbone to bra line.
Wedge
Imagine the breast as a clock or a pie. Examine each wedge from the outer edge to the nipple, then move to the next.
Three levels of pressure
On each spot, press through three depths — light for the skin and surface tissue, medium for the middle layer, and firm down to the chest wall. None of this should hurt.
LIGHT
Skin & surface
Just enough pressure to move the skin.
MEDIUM
Middle layer
Sinking into the body of the breast tissue.
FIRM
Down to the chest wall
Reaching the rib cage beneath the tissue.
Three depths, same spot — light, medium, firm. None of it should hurt.
What to notice
Most changes you find will be benign — cysts, hormonal lumpiness, fibrous tissue. The point is not to diagnose, but to notice and to share what you notice with someone qualified to help interpret it.
With your eyes — visual signs
A new dimple, pucker, or indentation in the skin.
Skin that looks like an orange peel (peau d'orange).
A nipple that has newly inverted or changed direction.
Persistent redness, scaling, or a rash on the nipple or areola.
Visible asymmetry that is new or changing.
Spontaneous discharge from the nipple — clear, bloody, or otherwise.
With your hands — touch signs
A lump or thickening that feels distinctly different from the surrounding tissue.
An area that feels harder, fixed, or doesn't move with the rest of the tissue.
Persistent tenderness in one specific spot, unrelated to your cycle.
Swelling or a lump in the armpit or above the collarbone.
Warmth or unusual heat in one localized area.
If you find something new, give it one menstrual cycle to resolve (unless it is clearly worrying — then call sooner). Hormonal lumps come and go with the cycle. A lump that persists across a full cycle, or one accompanied by any of the visual signs above, deserves a phone call.
A reflection
"To know your body is to love it well. The monthly check-in is not surveillance — it is intimacy."